Welcome to a tutorial where you will learn how to create a clothing item with transparencies in a simple and easy way.
First of all, I want to thank Ayla Perez for teaching me how to do this and helping me with this tutorial. You can find some great Sims 4 downloads, as well as a video tutorial in Spanish on how to creat transparent or semitransparent clothes, in her blog.
Step 1
Firstly we open, a photo edition program we feel comfortable using. I will use Photoshop CS6.
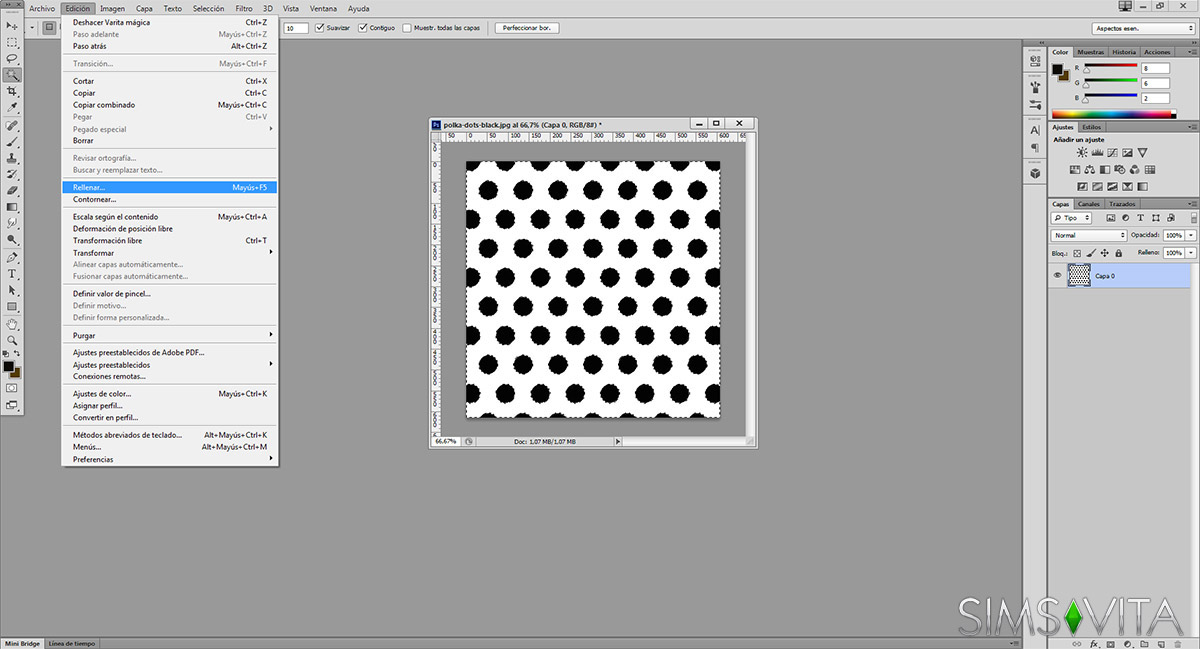
For this tutorial I will design a pattern with the background semi-transparent and black polka dots on top. We open the image of the polka dots pattern we have downloaded from the Internet.
With the magic wand tool we select the white background and fill it with black instead in order it matches the top’s background color (which as you will have deduced, will be black).
Step 2
We copy the background to a new layer (by clicking “Layer via copy”).

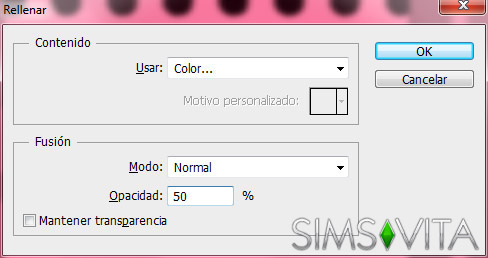
Step 3
We adjust the transparency of the layer (by doble clicking in the layer) to 25%.
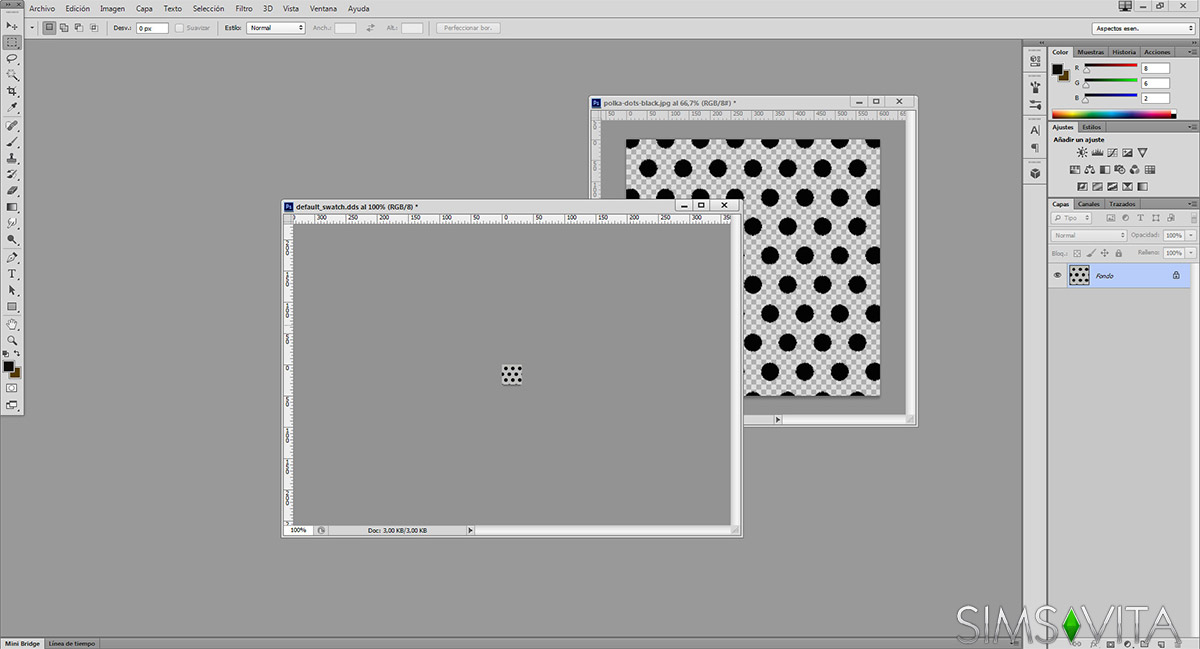
Step 4
Now that we have our pattern created, we will use it to create a custom Swatch for the top we are about to create.
Step 5
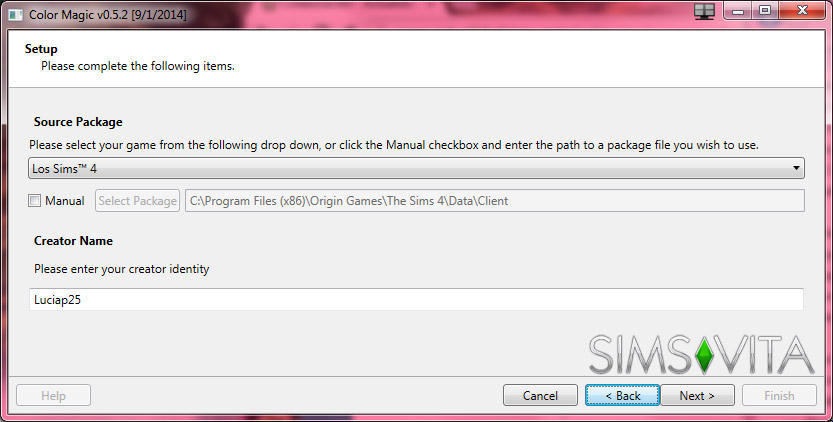
We open up Color Magic (when I made this tutorial, I used 0.5.2 version - you can download the latest version available here), a program that enables us to create retextures for both The Sims 4 and the CAS demo.
You must keep in mind that the packages for one game are not compatible with the other. In our case we will select The Sims 4.
Step 6
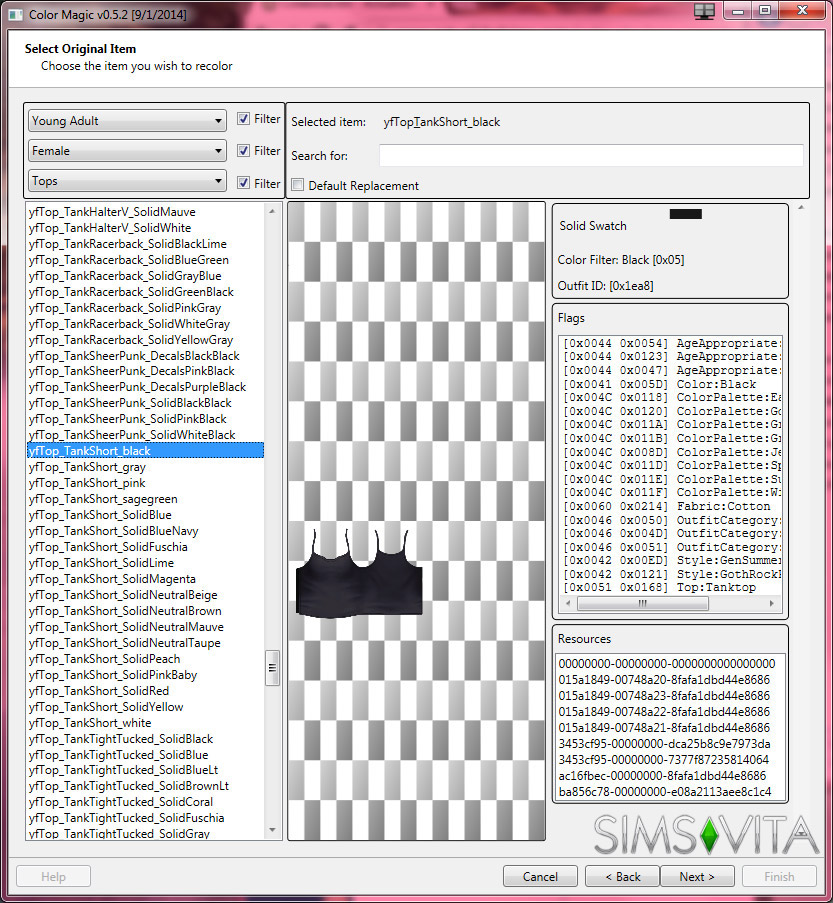
We select the top we will retexture.
Step 7
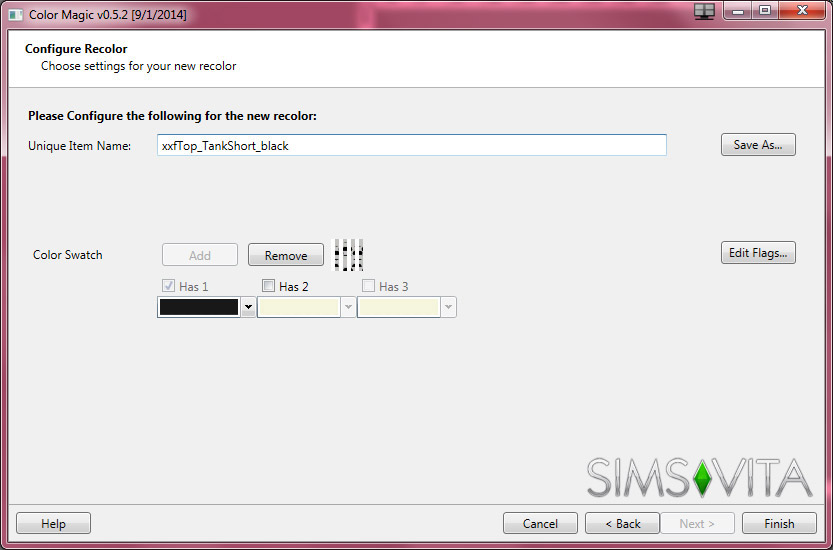
It’s very important to change the name of the file. Here we also add our custom Swatch. Afterwards we click Finish. We will open after the S4PE to export the .dds
Step 8
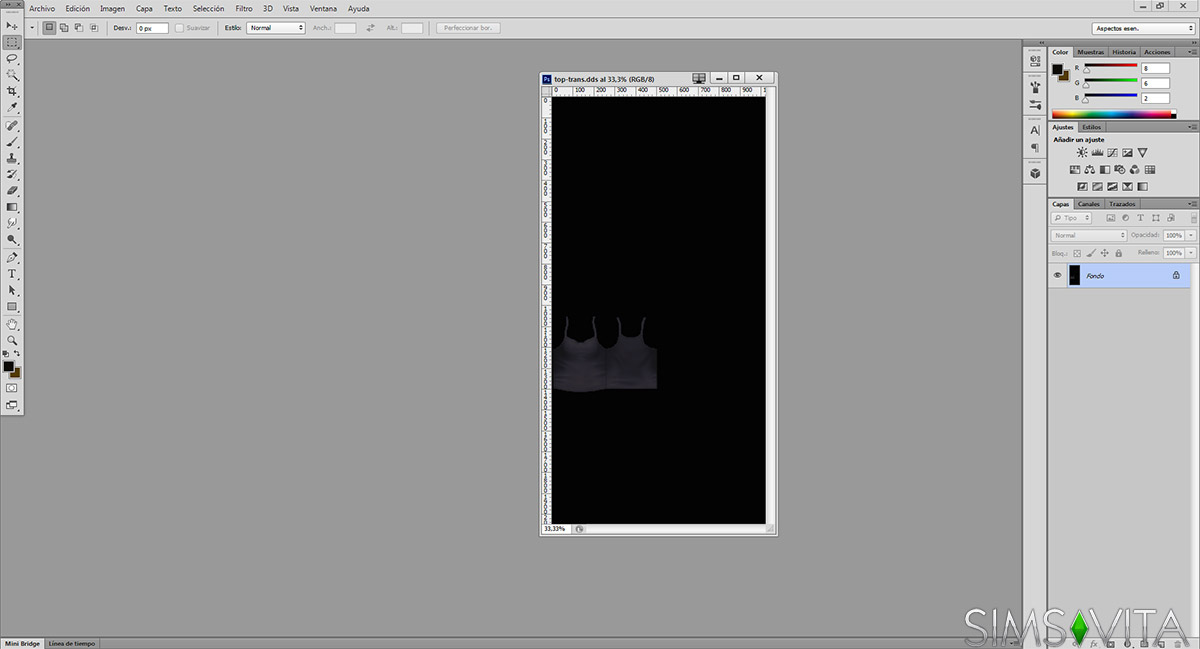
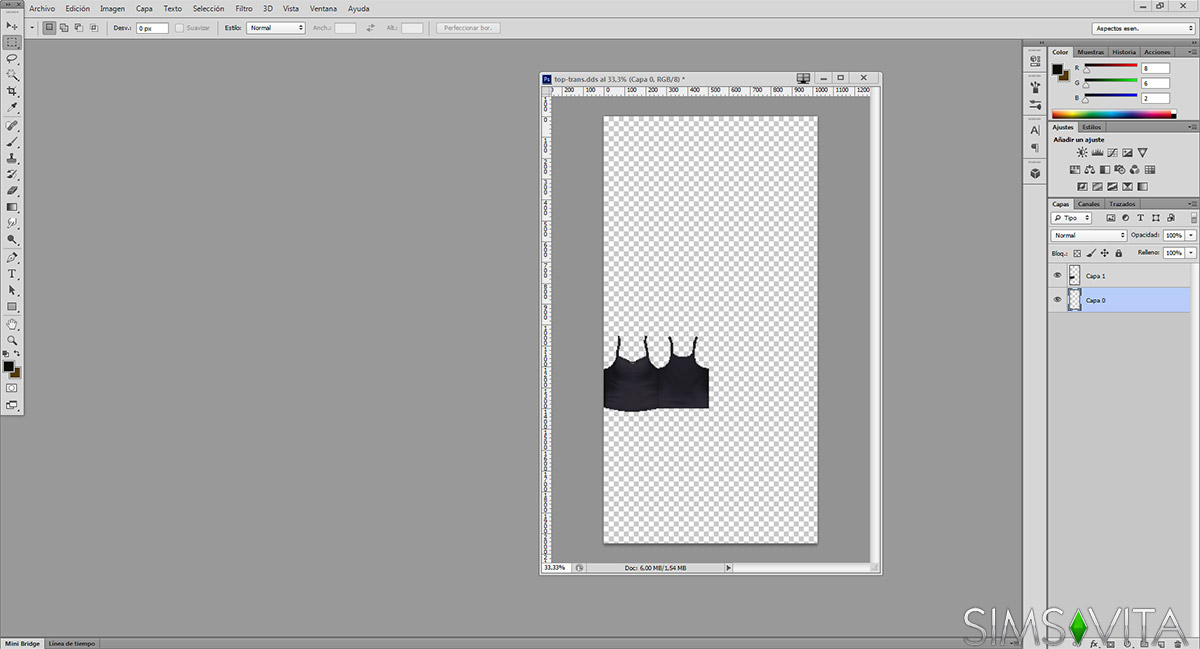
We open the top’s .dds file in Photoshop.
Step 9
We select the top’s outline with the magic wand and copy it to a different layer.

Step 10
We unlock the background layer by double clicking it and then remove the content of this layer.
It’s very important to erase with the Eraser tool all the saw tooth edges the top will have by default since these will then appear in the game.
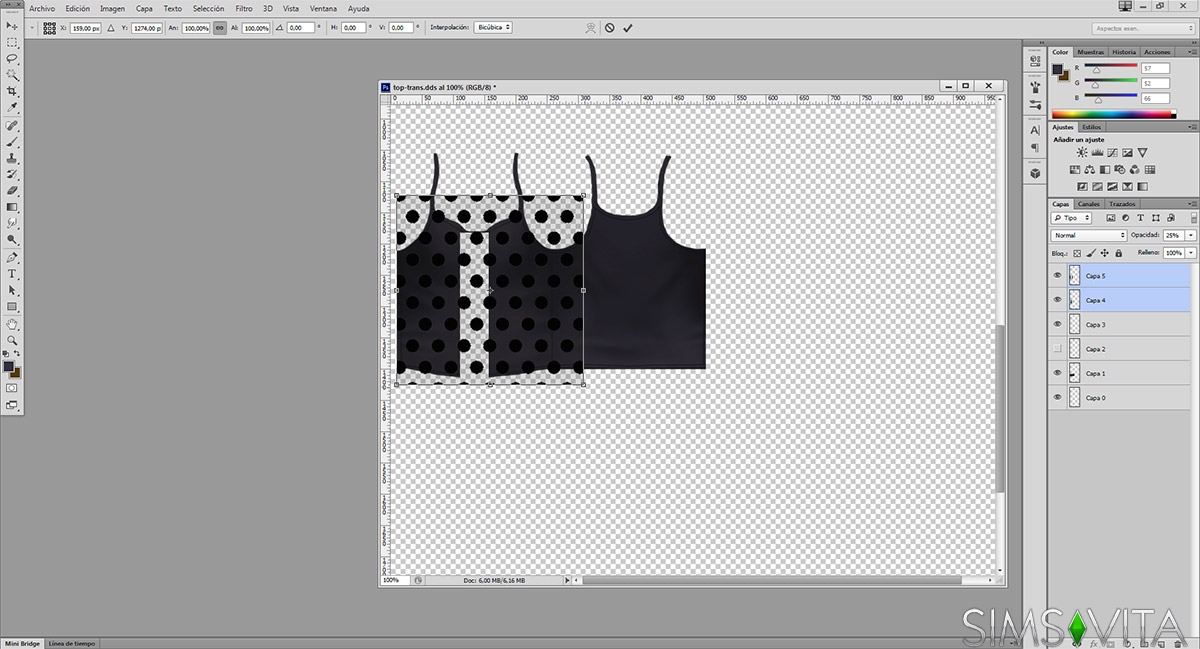
Step 11
We select using the Rectangular Marquee Tool the section of the top where we want to have the transparency.

Step 12
We then copy the selection to a new layer and erase this selection from the previous layer. Now, we drag the layer from the pattern we previously created into this document.
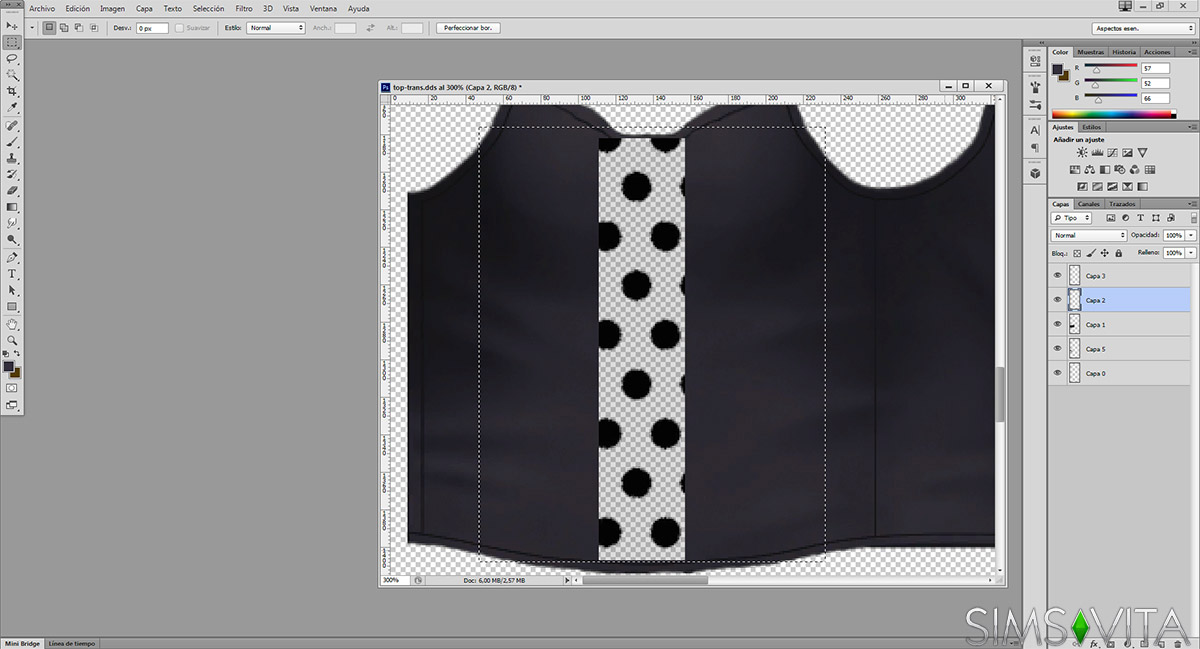
Step 13
We adjust its size to the space available using “Free transform” and the Eraser tool.
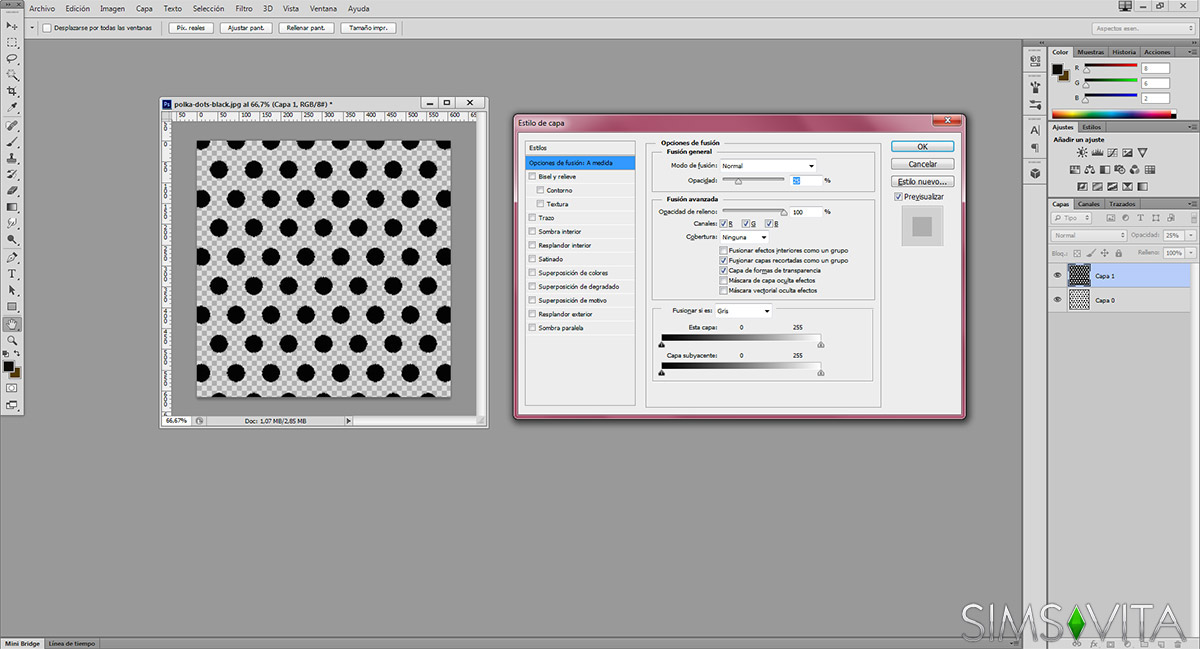
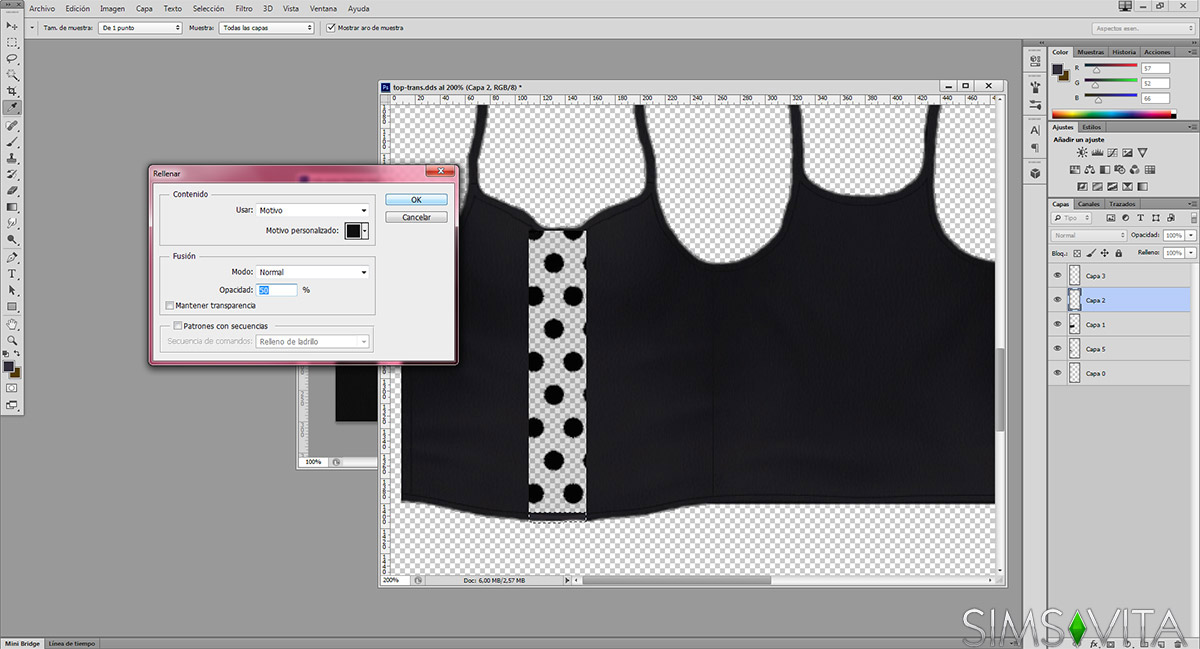
Step 14
Now we will proceed to change the texture of the top’s background in order it has a more realistic appearance. In order to do this, we create a custom pattern.
We adjust its opacity to 50% in order the top’s shadows can be still seen.
Step 15
In order our transparency appears as such in the game, we must remove the alpha channel. To do so, we go to the Channels tab and eliminate Alpha channel.
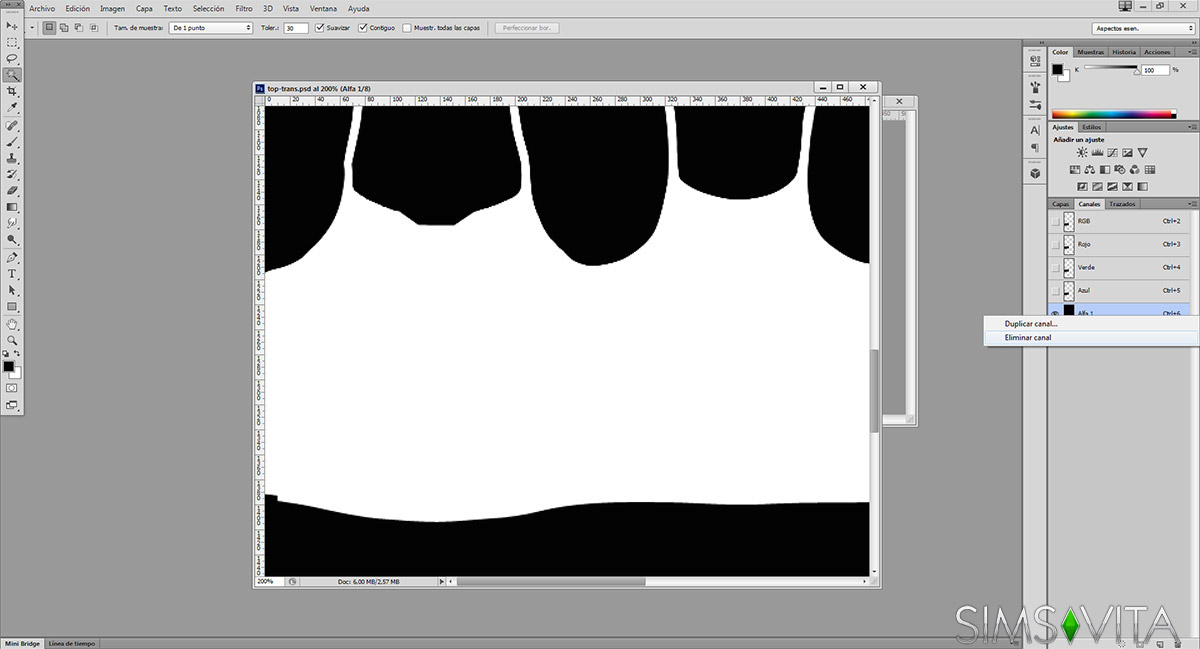
Once we have done that, we can save the file and import it to S4PE again.
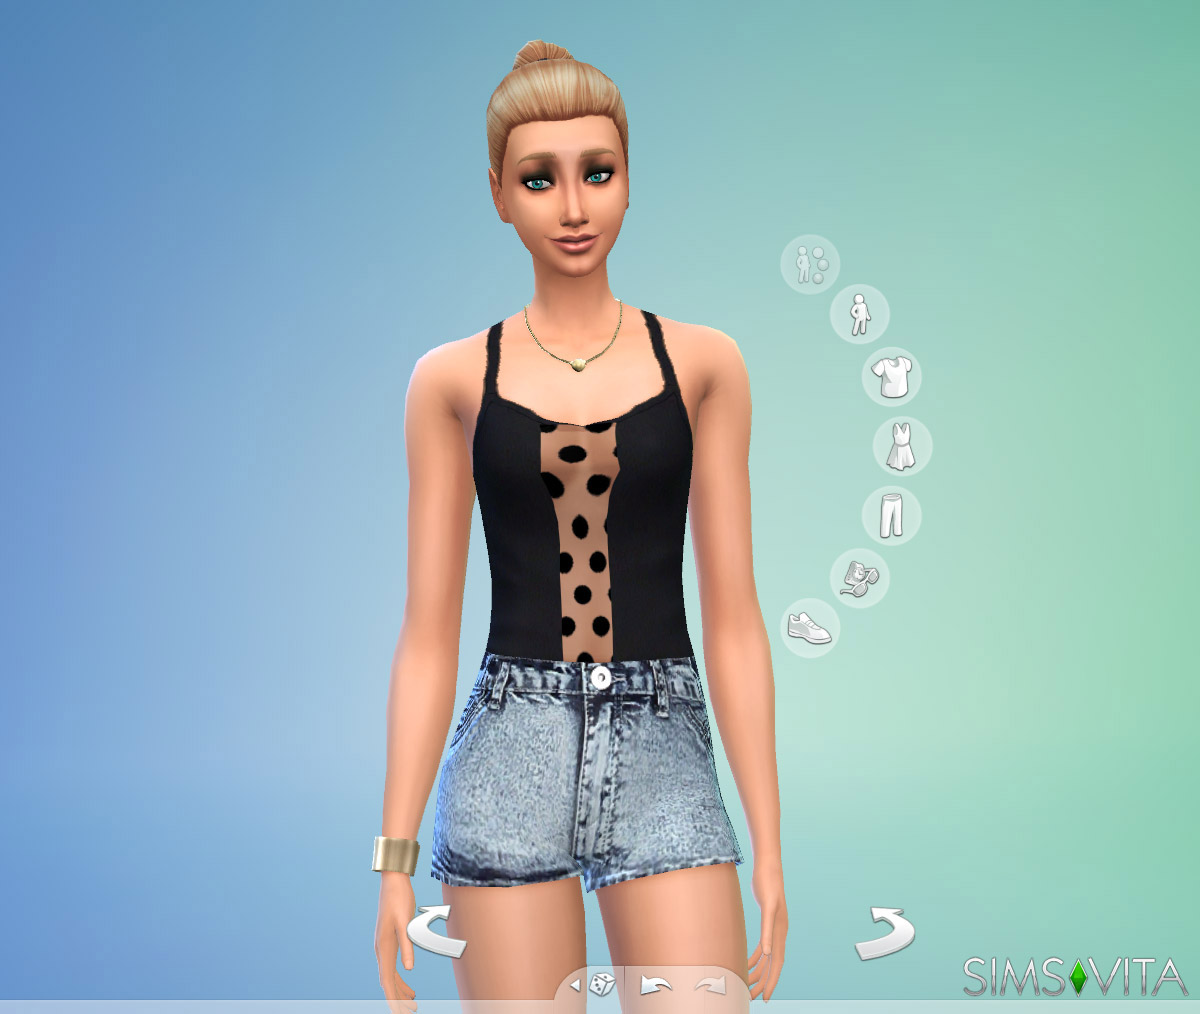
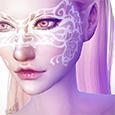
Final result
And here we have the final result – our custom top with transparencies!
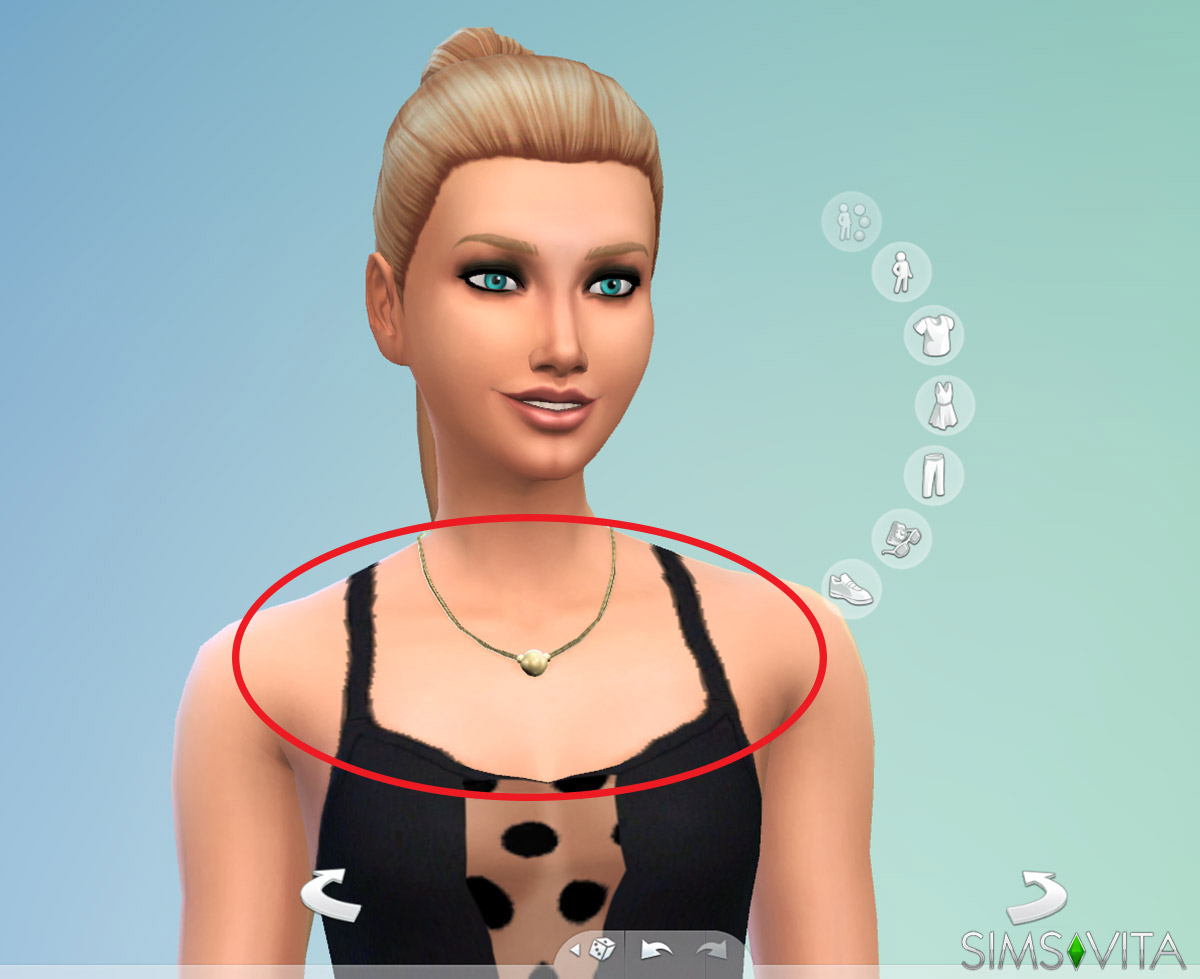
As you can see, the edges aren’t very smooth (they are still quite ragged). We can improve this with the rubber tool in Photoshop and lots of patience!
I hope this tutorial has been helpful and that we all little by little easily manage to create our own clothes for The Sims 4.

There are no comments to display.